Thursday, September 6, 2012

Easy-Peasy Drawstring Howl

Yesterday, I finished the first item I've made for myself in a long while..

Apparently, the only things I can improvise are cowls....so here's another one! Except this one is also....A HAT!!

I had some more of the wonderful Drops Karisma Yarn in the deep greyish-brown that I've used for some socks before. I kindof just started knitting randomly and made decisions about the pattern along the way...but here's the result anyway:

CO 100 stitches on a round 3.5mm needle.

Rows 1-7: Ribbed, K2 P2*

R  8-13: K to end
R 14-18: P to end
R 18-24: K to end
R 25-27: P to end
R 28-30: K to end

R 31-32: P to end
R 33-38: K to end
R 39-43: P to end
R 44-46: K to end
R 47-48: P to end
R 49-50: K to end
R 51-55: P to end
R 56-61: K to end
R 62-64: P to end
R 65-67: K to end
R 68-70: P to end

Of course, you don't have to follow this exactly- you can make your own variations of row numbers.

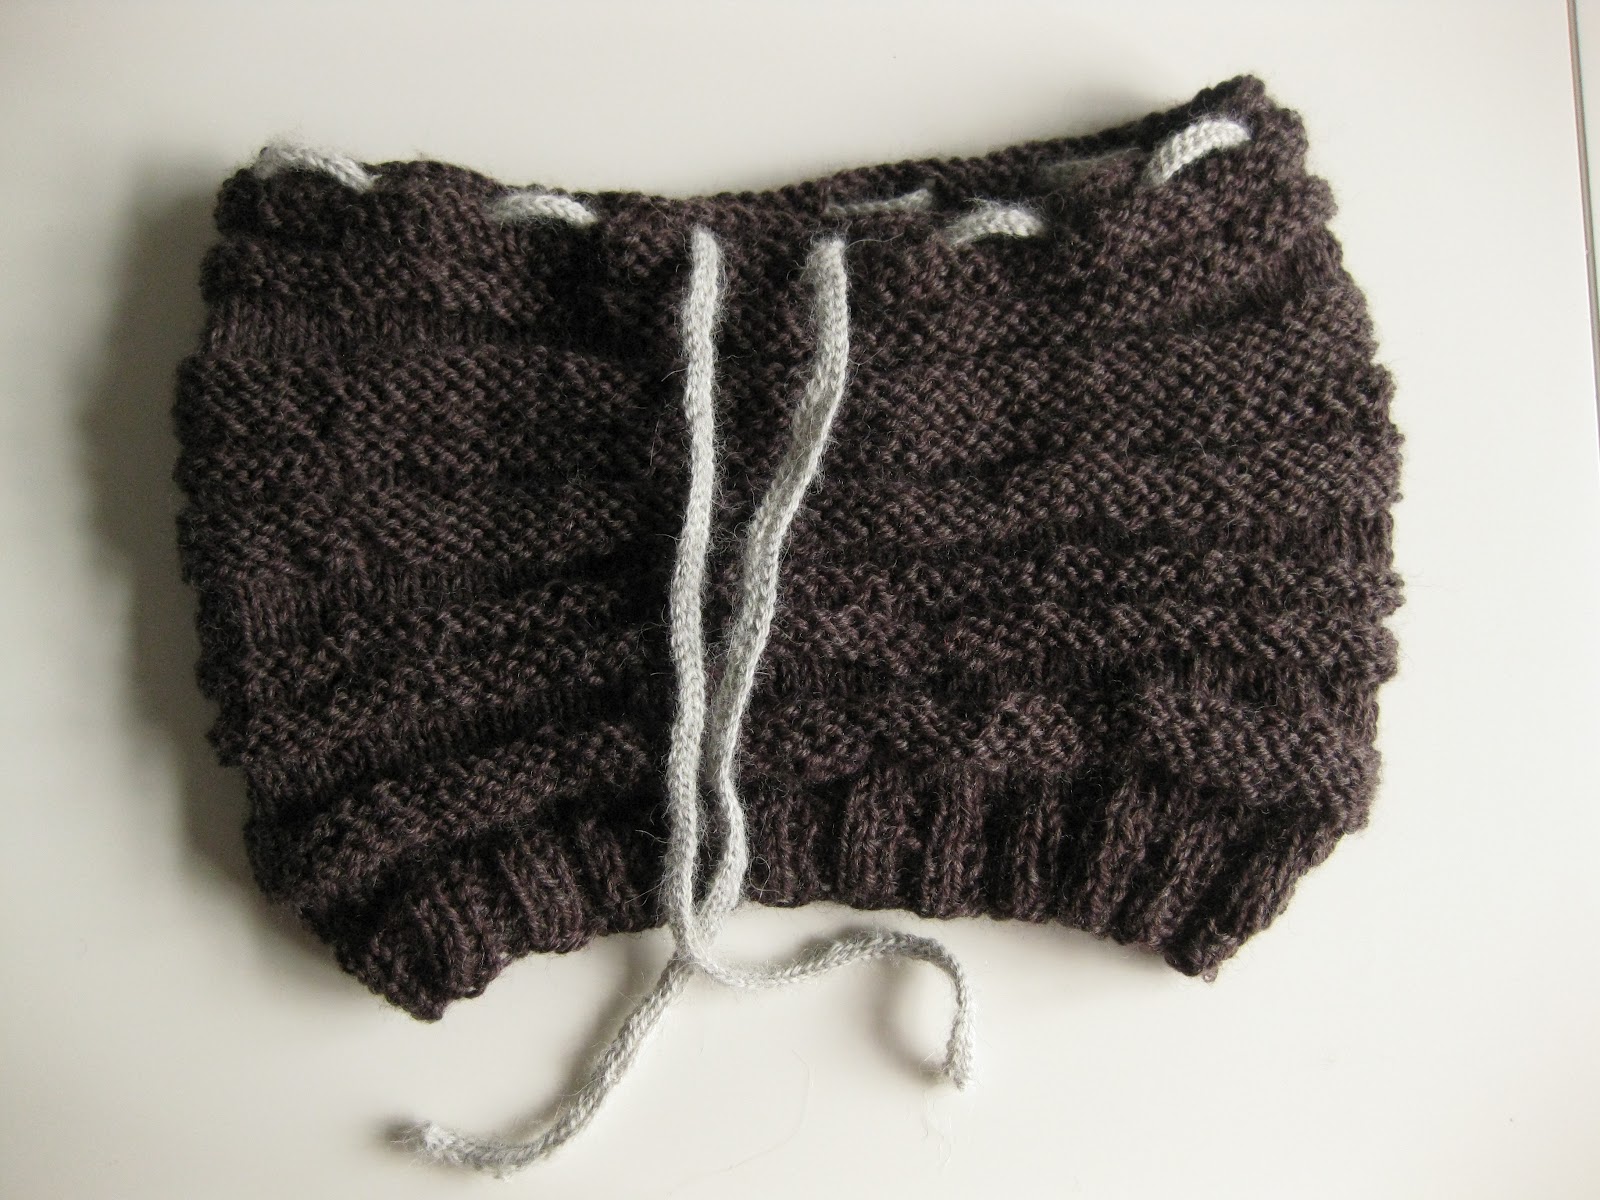
Anyway, as I did it, I finished with a row of holes to thread the drawstring through, as follows:

R 71: K3, K2tog, YO* to end
R 72: K to end
R 73: BO.

For the drawstring, I contemplated using the same yarn, but ended up choosing the finer Drops Alpaca. I crocheted the string back and forth (VERY basic crocheting). The string could also be knitted or braided, or you could even use a shoelace for a little more sporty feel. Just make sure the string is long enough to make it around the whole thing when it's loose, and that you can tie a knot or a bow in it.


Tuesday, March 13, 2012

A New Chunky Man-Cowl for Mr. Man!


The cowl I made last spring was very well received and has been used pretty much every day for almost a year now. I thought it was time to make a new one and this time I would make a short one and knit it full circle instead of knitting a scarf and sewing the ends together, like I did last time.

I had found these beautiful colors in Drops Andes yarn, which is bulky and wonderfully soft. The colors are perfect with all the khaki and chinos that have been in recently. The project was easy- the bulky yarn and large needles make it quick, and I used the same waffle pattern as I did for the other cowl, so there wasn't so much new stuff to figure out.

What you'll need:

A circular 5mm pin, 60cm long and 1-2 skeins of Andes (or another Super Bulky yarn). I used 2 different colors, one main color (burgundy) and another for the edge (brown/grey/purple-ish).

CO 56 stitches with the edge color and knit the following in the round:

6 rows of rib stitch for the edge: *K2, P2*.

Then switch to the main color and knit the following in the round:

Rows 1 and 2: K to end.
Rows 3 and 4: *K2, P2*.

Repeat rows 1-4 until you've reached the desired "height" for the cowl.
I used an entire skein of the main color.

Switch back to edge color and do 6 rows of rib stitch, just like in the beginning.

BO and sew the ends in.

VoilĂ !

P.S. If you want to make the cowl wider or tighter around the neck, remember to add or remove in multiples of 4 stitches to keep the pattern in order. This one is already starting to loosen up, so it may be a good idea to cast on only 52 or 48 stitches to keep it nice and snug.

Thursday, September 8, 2011

Lunch muffins


This is a super easy recipe, and the muffins works great as a supplement to salad and soup, or as a good addition to everyday lunch.


For the dough you'll need:
  • 4 dl flour, I recommend 50/50 regular flour and wholemeal flour 
  • 1 dl muesli (plain without fruits)
  • 1 teaspoon baking powder
  • 50 gr butter (soft but not melted)
  • 2 dl low fat milk
  • 2 dl cheese, I used mozzarella in small cubes
  • 1 teaspoon salt
 Mix together the flour, muesli, baking powder, salt, butter and milk. Mix in almost all of the cheese and the dough is ready!

Then add the filling you like, or follow my example:
  • a couple of slices of ham
  • 2 carrots, grated
  • 2 table spoons of pickled peppers
  • a couple of leaves of basil, cut in small pieces
  • 3 table spoons of black olives, sliced 
Mix the filling with the dough, and put it into a muffin pan (the baking tray thingy with holes in it). I think ten muffins turns out the best in size and shape. Sprinkle over the last of the cheese, and bake for 20 minutes on 200 degrees (400 degrees farenheit)

When the muffins are done, let them rest for about five minutes before removing them from the tray (the cheese will be melted and not cooperative) and then let it cool of on a rack. And done!

Sunday, May 29, 2011

Sugarfree icecream


A big portion of icecream is just the best treat. I stumbled across this way of making icecream some time ago, and I was not convinced. But yesterday I desided to go for it (mainly because I did'nt want to go out to get some) and I must say it surprised me! The texture is super, and it is so rich and sweet. This version is with strawberry and chocolate and is enough for one big portion.
Step 1:
Roughly chop two bananas and put them in the freezer. I froze them in a small plastic bag, so that I could keep them separated (so they don't stick to each other) This will take 1 - 2 hours.

Step 2:
This is the fun part. Put the bananas in a blender (that can handle icecubes) and add the flavour of you're choice. I added a handful of frozen strawberries and a few bits of 70% chocolate. If you blend it straight away it might be a good idea to add some milk to get the right texture. But it can be left out if you are patient enough to wait for about ten minutes so the fruit will melt a bit and get more moisted.

Blend until smooth and delicious. And that is it!


For this chunky monkey inspired version, do step 1 as above.

Step 2:
Put the bananas in the blender and add two teaspoons of cocoa powder and a few of bits of 70% chocolate. Blend it (and again, add milk if the texture is'nt perfect) and garnish with roughly chopped walnuts and chocolate.

Saturday, May 28, 2011

Super simple low-carb lunch


I consider my selfe very lucky, because I don't have any serious food allergies. So I can eat everything, and can get inspired by anything! This time it is the low-carb lifestyle of my uncle that inspired me to make this very easy lunch.

For one person you'll need:
  • 1 avocado
  • about 4 inches of cucumber
  • 1 boiled eg (very smart to boil several for later lunch projects)
  • 1 handful of chichpeas (I use the canned ones, so I don't have to soak them in water befor use)
  • good olive oil
  • salt and pepper
  • parsley
Chop the avocado, cucumber and eg roughly. Put them on a plate or in a bowl, add the chicpeas and sprinkle with olive oil. Add salt and pepper, garnish with parsley and you're done!

Monday, May 23, 2011

Wonderful carrot soup

Healthy and easy to make, this deliciously full and spicy soup is a perfect rainy-day treat!


I love this as a carrot soup but I often make it with whatever I have in the fridge, adding a bit of bell peppers, chili, broccoli, cauliflower or turnips.

For the basic carrot soup, you'll need:

1 cube Chicken or vegetable stock.
300g Carrots
One large Onion.
2 tsp Madras Curry
1/2 tsp Fresh ginger (1/2 - 1 tsp powdered ginger)
20g Butter (optional)
Salt and pepper
- - -

Set about 1/2 liter of water to boil in a large pan. Add the chicken stock, followed by the carrots (and other vegetables), and onion. If you use fresh ginger, add it to the pan as well.

Cook the carrots/vegetables until they're soft and mushy.

Process the carrots/vegetables with a hand blender to make a thick puré.
(Sometimes I drain a bit of the water, keeping it to the side while I process the vegetables and adding it bit by bit to better control the thickness and texture of the soup.)

If you're using powdered ginger and butter, add it now along with salt, pepper and curry. Keep tasting as you go along until the flavor is just right.

Garnish with a bit of sour cream and a cilantro leaf (parsley if you don't like cilantro).

Serve with toasted black bread (dark rye bread) and butter and/or cheese.

Yum!

Thursday, May 19, 2011

Almost seamless baby helmet


When my friends startet to pop out babies, I off course started knitting tiny and soft stuff for the newborns. I base everything I know about babies on what I learned from my seven years younger brother, and he always had the cutest baby helmets. I found a couple of patterns for knitting helmets, but after knitting several I found that they never turned out as I wanted them to. So I had to make my own, and here it is. The pattern is knitted sideways and is really simple (if I have explained it properly). The point is to get a good fit, with as few seams as possible, and I think it worked out really good.
I am sorry about pretty bad pictures, and I will update them as soon as I find a cute baby model...

The pattern will fit 2 - 4 months old. I will come up with other sizes later.

Cast on 36 sts on needle 2,5 (Gauge: 28 sts = 4 inches)
  • R1: (front towards you) S1, K2, YO, K32 (one stitch left on left needle)
  • R2: K36
  • R3: S1, K2, YO, K32 (two stitches left)
  • R4: K36
  • R5: S1, K2, YO, K32
  • R6: K36
Repeat row 5 and 6 until there is 15 stitches left "unknit" (row 30)

Row 29
Row 30

  •  R31: (front towards you) S1, K1, K2together, K33
  • R32: K36
Repeat row 31 and 32 until there is 36 stitches left in all.
Repeat row 5 and 6 until there is 12 stitches left "unknit"
Repeat row 31 and 32 until there is 36 stitches left in all.
Repeat row 5 and 6 until there is 15 stitches left "unknit"
Repeat row 31 and 32 until there is 36 stitches in all.
Bind of.

Sew the helmet together in the back, and add strings (photos will be posted soon)